If you’ve got only a few minutes, you can drastically improve your Internet privacy with these 11 tips. Why do just 10 when you can go to 11?
1. Be careful on social networks.
Almost everything you say and do on social networks is public by default. Post with caution or a pseudonym.
Facebook has dozens of privacy settings, so start with the biggest ones: turn OFF tag suggestions, turn ON tag and profile review, disable access to apps you don’t use or trust, and only share with friends. If you’re sharing with friends of friends, more than 150,000 people on average can see your info.
 2. Use your browser’s private browsing mode.
Private browsing mode stops other people who have access to your computer from knowing which sites you’ve visited. Cookies are automatically deleted when you close your window, and your history of web sites visited, passwords, autofills, searches, and downloads isn’t saved.
Enable private browsing mode in your browser’s preferences. It’s called Incognito Mode in Chrome, Private Browsing in Safari, InPrivate in Internet Explorer, and Private Browsing in Firefox.
There are several important limitations to private browsing modes, however:
- They don’t hide or change your IP address, which your Internet service provider (ISP) can use to identify you.
- They don’t prevent websites, advertisers, and ad networks from storing information about your browsing history. Although your browser won’t store your history, the websites you visit still can.
- They don’t stop surveillance, keyloggers, or people simply looking over your shoulder.
3. Go beyond private browsing mode with privacy add-ons like DNT+.
Over 580 tracking technologies and 200 different companies, including social networks, follow all your activity across the web, building up a detailed profile about what you read, like, click, and buy to sell to advertisers.
Free browser tools like DoNotTrackPlus (DNT+) stop this tracking and make invisible trackers visible with a click of a button. DNT+ also blocks social buttons from sharing your information. You can still share, but now the choice is yours, not Facebook’s.
4. Use secure browsing (HTTPS) whenever possible.
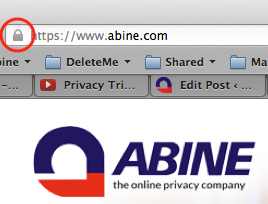
HTTPS prevents others from snooping on your wireless connection. It’s particularly useful when you’re using insecure wireless connections, like those in cafes or airports. You’ll know that a site is secure and using HTTPS when you see a lock icon next to the URL of the site you’re visiting.
The Electronic Frontier Foundation (EFF) offers a helpful & free tool for Chrome and Firefox called “HTTPS Everywhere.” You can also use a paid Virtual Private Network (VPN) service to securely encrypt all your web traffic. PrivateWiFi and AirVPN are particularly good choices, and TorrentFreak did a comprehensive inquiry into the VPNs that take anonymity seriously.
5. Use multiple email addresses.
Have a different email for each of the following areas of your life: people you trust, signups for online accounts, signups for offline accounts, legal, work, & acquaintances (or any other category you’d like to create). That way, one email getting hacked or compromised won’t affect the others.
Notable free email services with good privacy protections include Hushmail, Lavabit, or Vmail.
6. Google yourself regularly.
Search for all variations of your name and contact info to find out if your personal info is publicly available online. Information about you can also show up in more than a dozen of Google’s other search services, such as Images, Videos, Blogs, Groups, News, and Realtime (which monitors social network mentions). There’s a lot more out there besides the original Web search, so make sure you check these additional results pages. They’re listed across the black bar on the top of your Google window.
7. Hide your IP address with a proxy.
Your computer has a unique identifying number, but a proxy server masks it. Tor is a well-known free proxy, but paid options like FoxyProxy are also available.
8. Delete your contact info from phonebook-like websites.
Hundreds of websites publicly post & sell your home address, email, family members’ names, & more, which is a gateway to stalking, identity theft, and unsolicited marketing. Try searching for yourself on Spokeo.com for one example, and learn how to remove yourself from the biggest ones.
9. Use different profile photos for different areas of your life.
You can also be found through existing photos of yourself with reverse image searches such as TinEye or Google. Reverse image search works by looking for photo fingerprints, exact matches of existing photos. Merely similar photos won’t show up, but cropped and differently-sized versions of the same photo will.
If you’re worried about reverse image search, use different images for different contexts. Don’t use the same photo on your employer’s profile page that you have as your Facebook profile picture. Keep separate photos you use for work, photos you use for family, photos you use for friends, and photos you want to keep entirely private. That way, someone doing a reverse search with a particular image will only find a limited set of results: the ones you’ve chosen to associate with that image.
10. Stop broadcasting your geolocation.
Facebook Places, Foursquare checkins, & Twitter may be giving out your location, and some third-party apps can access your public social network checkins and literally put you on the radar, like the controversial Girls Around Me app did.
To turn off geotagging on Twitter: go to Settings, then make sure to uncheck the box next to “Add a location to my Tweets.”
Many smartphones record the GPS location where you snapped a photo and appending it to that photo’s metadata. Disabling this feature depends on your specific device (find steps for popular phones from the I Can Stalk U project), but one general safety tip is to turn off your phone’s GPS connection when you don’t need it.
11. Beware of posting under your real name.
Whether you’re posting in a forum, social network, news article, or online group, there’s a good chance your comment will persist forever. If you decide to post something under your real name, ask yourself the New York Times question: “If this content were ever publicly released, would I be okay with seeing it on the cover of the New York Times?” If the answer is “no,” use a pseudonym.
Note that some websites, like Facebook, actually require in their Terms that you use your full legal name to sign up. If that rubs you the wrong way, avoid them or rebel by using a realistic-looking pseudonym.
Editor’s Note: This article is a guest post by our sponsor Abine.com, the makers of the browser extension DNT+. It’s FREE and keeps websites from tracking you online.


 Previous post
 Next post


